
























How to dilute a solution in chemistry (step-by-step explanation with examples)

Diluting a solution is a familiar procedure in many laboratories. Have you ever seen instructions like “prepare 100 mL of a diluted solution” and wondered: where do I begin? You’re not alone. Dilution is one of the most common procedures in chemistry, from high school labs to professional research. The good news: once you understand the logic, it becomes predictable and almost mechanical.
This guide explains exactly what dilution means, how the formula works, and how to perform a dilution safely and correctly.
What does “diluting a solution” mean?
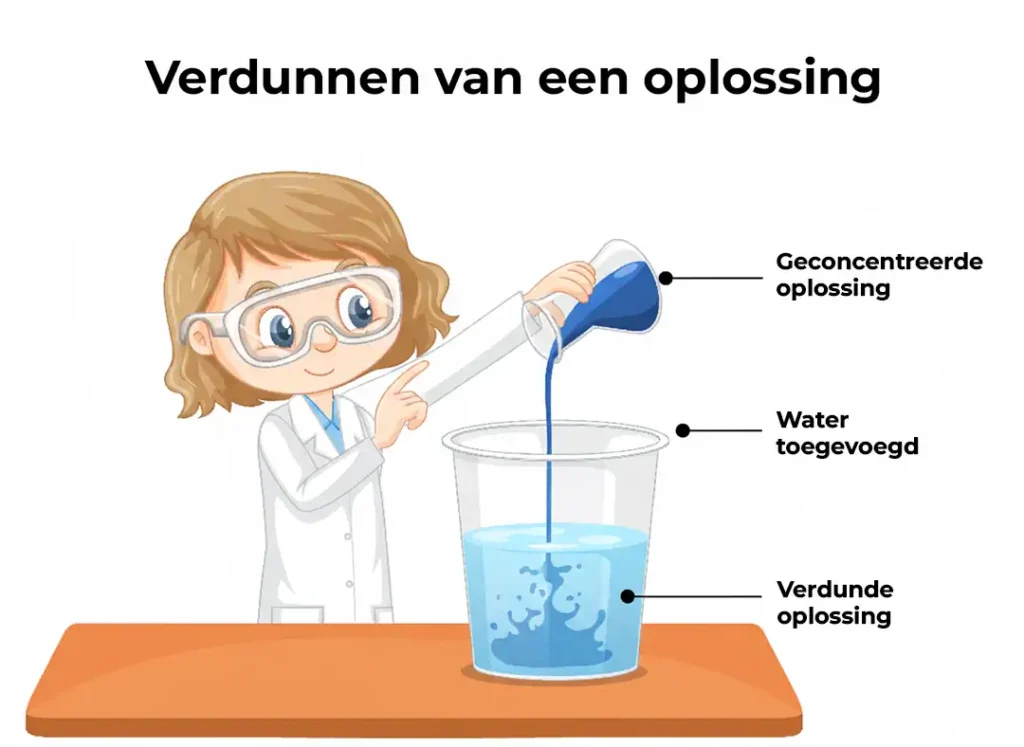
Dilution means reducing the concentration of a solution by adding more solvent, usually demineralized water. The basic idea is simple:
You don’t remove the dissolved substance; you distribute it over a larger volume.
Think of adding water to a glass of orange juice. The flavor diminishes, but the amount of juice remains. In chemistry, it works exactly the same way.
When diluting a solution:
- The amount of dissolved substance remains the same
- The total volume increases
- The concentration decreases
Once you understand this principle, the calculations become a lot simpler.
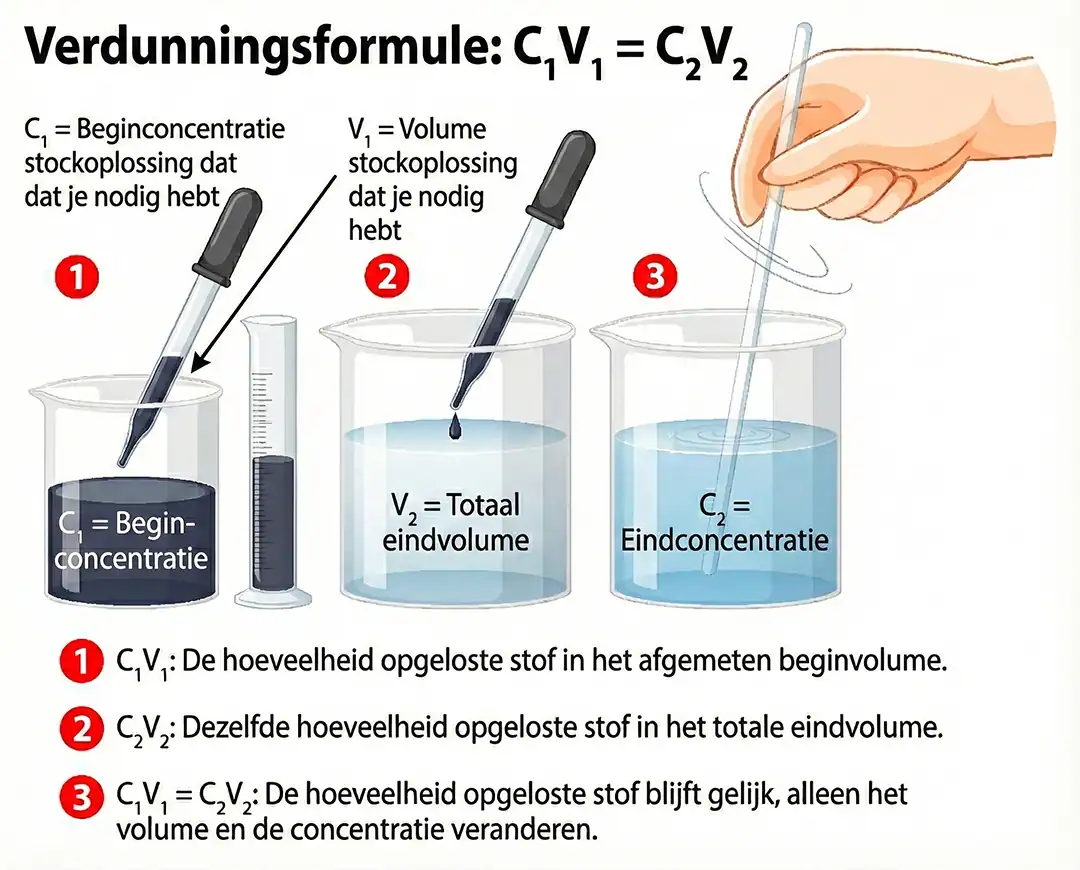
The dilution formula explained (C₁V₁ = C₂V₂)
For most dilution problems, you use one simple equation:
C₁V₁ = C₂V₂
This means:
- C₁ = initial concentration (stock solution)
- V₁ = volume of stock solution you need
- C₂ = desired concentration after dilution
- V₂ = total final volume of the diluted solution
Why does this formula work? Because the amount of solute remains the same before and after dilution. You only change the volume in which that solute is distributed.
Worked example: preparing a diluted solution
Let’s make this concrete.
Objective: Prepare 100 mL of a 0.1 M solution from a 1.0 M stock solution.
Step 1: Write down what you know
- C₁ = 1.0 M
- C₂ = 0.1 M
- V₂ = 100 mL
- V₁ = unknown (we will calculate this)
Step 2: Use the formula
C₁V₁ = C₂V₂
Step 3: Solve to V₁
V₁ = (C₂ × V₂) / C₁
V₁ = (0.1 × 100) / 1.0
V₁ = 10 mL
Step 4: Translate the calculation into actions in the lab
- Measure 10 mL of the 1.0 M stock solution.
- Transfer this to a volumetric flask.
- Make up with distilled water until the total volume reaches 100 mL.
- Mix thoroughly.
Note: You don’t add exactly 90 mL of water. You make up to 100 mL of total volume. This small detail often leads to errors.
Dilute with other solvents (not just water)
Water is the most commonly used solvent in school laboratories, but many chemical solutions are diluted with other liquids such as isopropanol, acetone, ethanol , or specialized organic solvents. The basic principle remains the same: you reduce the concentration by increasing the total volume while keeping the amount of solute the same. However, working with non-aqueous solvents involves a few additional considerations.
How do you practically carry out a dilution?
If the calculation is correct, the implementation is straightforward. A typical procedure:
- First measure the stock solution with a pipette or measuring cylinder.
- Transfer these to a volumetric flask or suitable container.
- Add solvent slowly.
- Stop once you reach the end volume marking.
- Close and mix gently by swirling or turning.
Accuracy is more important here than speed. Haste usually leads to volume errors or spills.
Common mistakes
Everyone makes them in the beginning. These are the classics:
Confusing added volume with final volume
If the final volume is 100 mL, that includes what is already in the flask.
Forgot to convert units
Concentrations are often expressed in mol/L and volumes in mL. Make sure you calculate consistently.
Rounding off too early
Allow for extra decimals when calculating and round off only at the end.
Gambling instead of calculating
Diluting seems simple, but guessing ratios often gives incorrect concentrations.
Most errors occur because steps are skipped, not because the chemistry is too difficult.
What is a serial dilution?
A serial dilution is a step-by-step method for making very low concentrations. Instead of going directly from strong to extremely weak, you work in stages.
For example:
- First dilution: 1 part solution + 9 parts water → 1:10
- Second dilution: repeat the same step → 1:100
- Third dilution: repeat again → 1:1000
This method is often used in biological experiments and analytical chemistry, because it is more accurate at very low concentrations.
Think of it like slowly dimming a light instead of turning it down to the lowest setting right away.
Safety when diluting chemicals
Basic rules also apply to simple dilutions:
- Always wear safety glasses and gloves in the lab.
- Add concentrated acid to water, never the other way around.
- Label diluted solutions immediately with concentration and date.
- Use clean glassware to prevent contamination.
Safety rules exist for a reason. Over time, they become routine.
Quick recap: dilution cheat sheet
Remember this while practicing:
- Dilution lowers the concentration by adding solvent.
- The amount of dissolved substance remains the same.
- Use the formula C₁V₁ = C₂V₂.
- Dilute to final volume, not based on an estimated addition.
- Work accurately and label everything.
Diluting might seem daunting at first, but at its core, it’s about controlled mixing. Understand why the formula works, follow the steps consistently, and you’ll find that most problems follow the same pattern. Practice a few examples, and it will become routine instead of stressful.